NPM Package Manager
To use all Node.js tools (or packages), you need the ability to install and manage them. For this, NPM (node package manager) was created, a package manager for Node.js. It installs the required packages and provides a user-friendly interface for dealing with them.
NPM has three main components:
- Websitenpmjs.com: reading and searching through package documentation.
- Command-line-interface (CLI): runs from the terminal and provides a set of commands for working with the registry and packages. It helps create scripts to run in the terminal.
- Registry: a large public database of development tools (packages).
Package is a small JavaScript library that solves specific problems. Packages are written by developers and shared with the community. This approach makes life easier because you do not have to reinvent the wheel, as all wheels have been available in the registry for a long time and are ready to use.
Packages make the implementation of all features more abstract, providing the developer with a convenient interface. You will have a cleaner and more readable code that is easier to maintain.
NPM commands
Here are the main commands that we will explain and use later.
npm initinitializesnpmin the project and creates apackage.jsonfilenpm installinstalls all dependencies listed inpackage.jsonnpm list --depth=0displays in the terminal a list of locally installed packages with their version numbers, without dependenciesnpm install [package-name]installs the package locally in thenode_modulesfoldernpm uninstall [package-name]uninstalls the locally installed package and updatespackage.jsonnpm startandnpm testrun thestartortestscript located inpackage.jsonnpm run [custom-script]runs a custom script located inpackage.jsonnpm outdatedis used to search for updates, detecting compatible versions programmatically and displaying a list of available updatesnpm updateupdates all packages to the most recent version possible
Project initialization
Each project starts with creating a package.json file: it monitors dependencies, contains additional information, makes it possible to write npm scripts and serves as an instruction when creating a new project based on the settings you already have. You can create package.json with the init npm command, thus initializing your project in the current folder.
npm init
You will be asked to enter your project name, version, description, and so on. You can just press Enter until package.json is created and placed in the project folder. So as not to press Enter, skipping empty fields, use the init command with yes selected. This flag is an additional setting for the command.
npm init --yes
Each flag has its shorthand notation. For the --yes flag, this is -y, so npm init --yes and npm init -y do the same thing.
Package.json will be created with default values. To set these values, run the following commands in the terminal, one by one, entering your name and email.
npm config set init.author.name "YOUR_NAME"
npm config set init.author.email "YOUR_EMAIL"
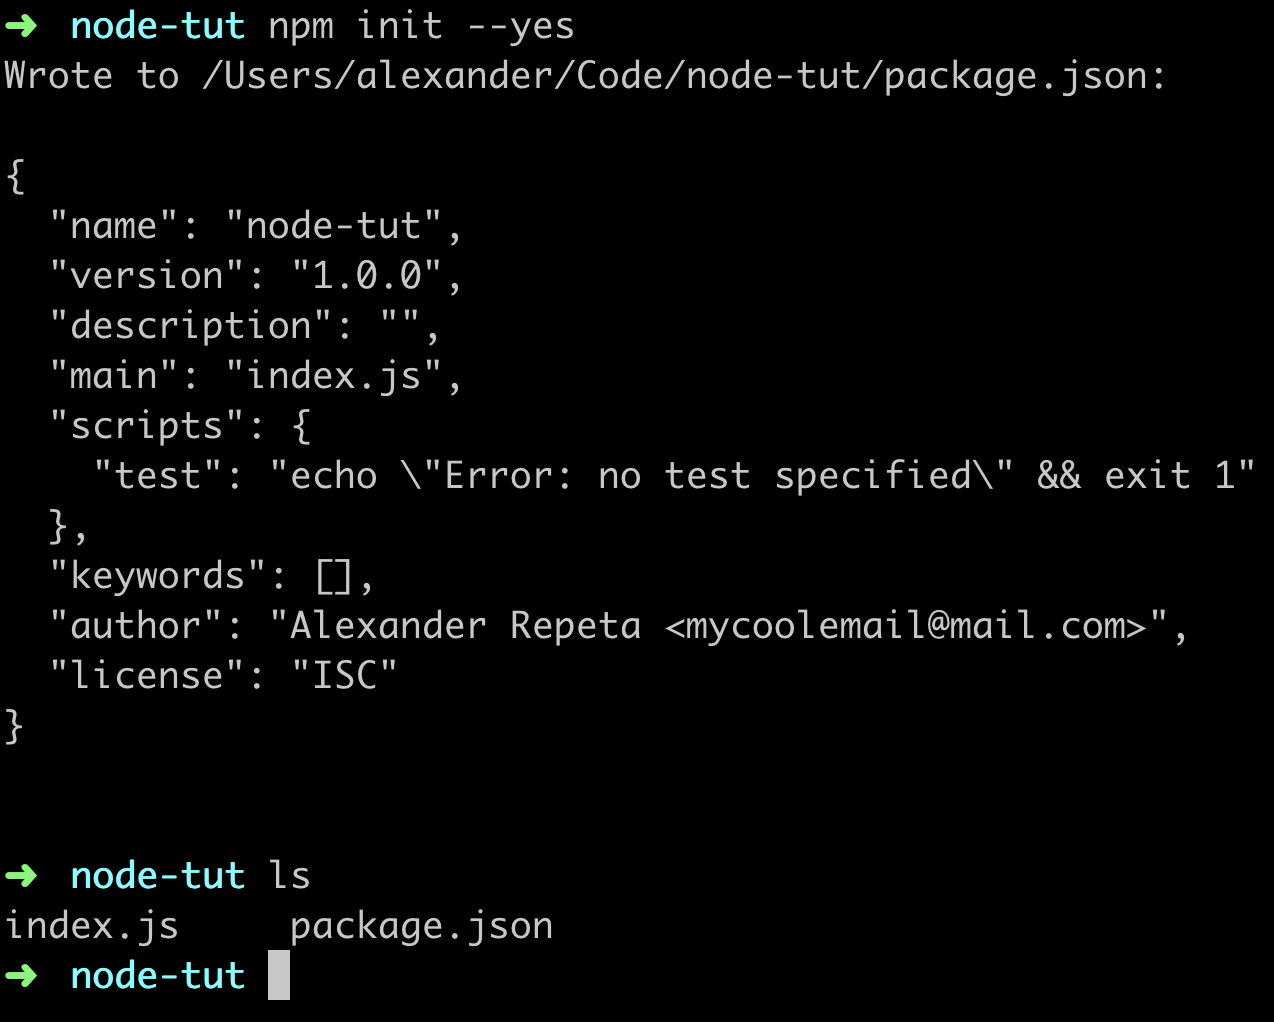
You can edit the package.json file manually or run npm init again. If you open package.json in an editor, it will look something like this. This is just project metadata.
{
  "name": "node-tut",
  "version": "1.0.0",
  "main": "index.js",
  "scripts": {
    "test": "echo \"Error: no test specified\" && exit 1"
  },
  "author": "Alexander Repeta <mycoolemail@mail.com>",
  "license": "ISC",
  "keywords": [],
  "description": ""
}
npm scripts
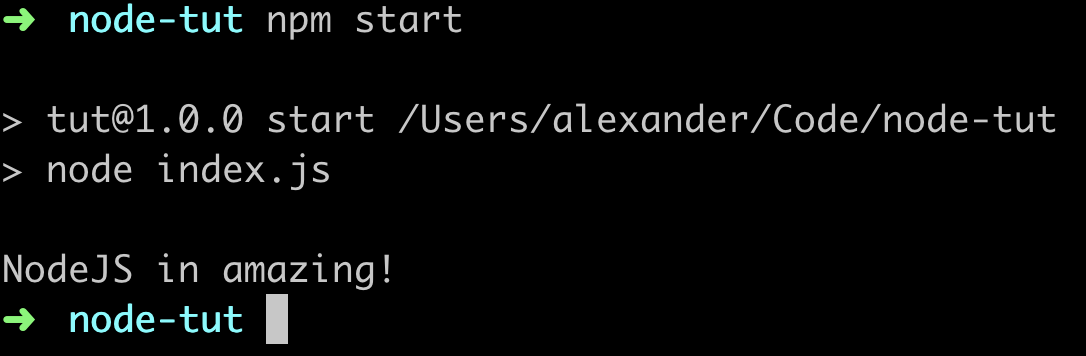
With scripts, you can run and execute installed packages. Using npm scripts, you can create build-tools for projects. Let's automate the launch of index.js. To do this, add the start startup script to the scripts field in the package.json file.
{
  "scripts": {
    "start": "node index.js"
  }
}
Now you can start it in the terminal with the npm start command.
If you create a script with any name other than start or test, it will run as npm run script-name; do not forget run. Check out the documents – How npm handles the "scripts" field.
Installing packages
One of the possibilities provided by npm is to install packages that are extracted from the registry and unpacked into the node_modules folder in the project root. After the package.json file has been created, you can add dependencies to your project.
A dependency is an npm package that is used during development. These are all kinds of utilities and libraries. Install a library, validator.js, to validate strings, for example, to enter user name in form fields.
npm install validator
NPM downloaded validator and placed it in node_modules, the folder that contains all external dependencies.
Do not add the node_modules folder to source control, as all developers have their own folders. If you are using Git, remember to add the node_modules folder to the .gitignore file.
Note that the created package-lock.json file is a snapshot of the project dependency tree. It ensures that the development team is using the same version of dependencies. NPM automatically updates it when you add, remove and update packages.
There is a new dependency in package.json in the dependencies field. This means that validator version 11.1.0 has been installed as a dependency and is ready for work. Packages are regularly updated and your version may differ.
{
  "dependencies": {
    "validator": "^11.1.0"
  }
}
In order to get the package interface in Node.js code, you need to call the require("module-name") function, passing it module name as an argument, without specifying the path; this is called absolute import. The path is not needed, since by default the module will be searched for in the node_modules folder. After its execution, the function will return the module interface – an object with methods or just a function, depending on the package.
const validator = require("validator");

const validateEmail = email => {
  return validator.isEmail(email);
};

console.log(
  "Is mango@mail.com a valid email?: ",
  validateEmail("mango@mail.com")
);

console.log(
  "Is Mangozedog.com a valid email?: ",
  validateEmail("Mangozedog.com")
);
After executing npm start in the terminal, you will get:
Is mango@mail.com a valid email?: true
Is Mangozedog.com a valid email?: false
Removing packages
Suppose the version of validator installed in the previous example is causing compatibility problems. You can uninstall this package and install an older version.
npm uninstall validator
Installing a specific package version
Now let's install the correct version of validator. In the installation command, version number is specified after the @ symbol.
npm install validator@1.0.0
Version-specific package installation is used in commercial projects to ensure that the codebase works properly and long-term support is possible. You can install the most recent versions.
Types of dependencies
Imagine a cake. To bake it, you will need products, ingredients. However, you will also need kitchen utensils such as bowls, spoons, spatulas, etc. Naturally, kitchens come with tables, ovens, refrigerators, etc. – things used to prepare and store meals, permanent tools.
The same is with project dependencies: some will be used in the resulting product, others are needed only at the development stage, and there are those that need to be used regardless of the project.
This is why the npm install and npm uninstall commands have three flags.
--saveindicates that a dependency is added that will be included in the final product. The package will be installed locally in thenode_modulesfolder, and an entry will be added to thedependenciesfield inpackage.json.--save-devindicates that a development dependency is added. The package will be installed locally in thenode_modulesfolder, and an entry will be added to thedevDependenciesfield inpackage.json.--globalindicates that a global dependency is added, that is, a tool that is available for any project. The package will be installed globally (on the system).
- If you omit the flag,
--savewill be used by default. - When uninstalling a package, you must select the correct flag, the same as when installing.
- Do not install packages globally if you are working on a project with other developers.
Package versioning
Packages have version numbers associated with them. Version numbers follow the SemVer standard.
npm outdatedis used to search for updates, detect compatible versions programmatically.npm updatewill update all packages to the most recent version possible.npm update [package-name]will update the specified package.
If you do not trust machines or want a specific version of a package, you can open package.json and manually change the package version, then run npm install.
Cache management
After installing a package, npm saves a copy of it in the cache, so the next time you install it, you will not need to download it from the Internet again. The cache is stored in the .npm folder of your home directory.
This folder gets cluttered with old packages over time, and it is a good idea to clean it from time to time, not too often (a couple of times a year). Caching is useful, as it reduces the installation time of already used packages.
npm cache clean